Materials:
Felt (scrap pieces work great!)
Barrettes (I found a box of 30 at Micheal's labeled as Quilt binding clips)
Felt (scrap pieces work great!)
Barrettes (I found a box of 30 at Micheal's labeled as Quilt binding clips)
scrap paper (for pattern)
scissors
sewing machines (optional)
needle and thread
Button and ribbon embellishments

1. making the pattern: first trace around the barrette with a pencil

2. Draw around the barrette trace to allow for a seam (trust me it is MUCH easier this way! <- I didn't allow for a seam and a funny thing happened: the barrette did not fit! ) The seam allowance does not have to be very big since we are using felt.

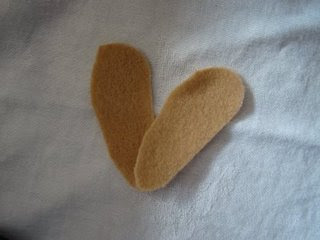
3. cut out your pattern and pin it on a piece of felt that has been folded so that there are 2 layers. We are making a jacket for the barrette to fit into so we need 2 sides.

4. cut out the barrette jacket pieces
5. Sew the two pieces together around the sides and bottom but leave the top open so we can put the barrette into. You can machine sew or hand sew.

This is what it should look like after you sew it.

6. cut off the extra felt around the edges. Try to get close the seam but not too close that you cut it open (found that out the hard way too!)

7. Now decide what side is going to be the back (since they look the same on mine it did not matter much!) and flip up the top part. See picture below:

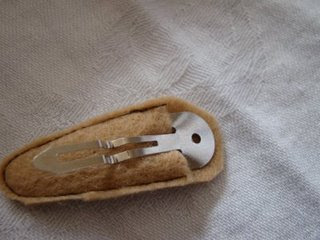
8. cut off the top part on ONLY ONE layer. this is going to allow you barrette to slid into the jacket.

9. now slide you barrette into the jacket.
10. Now choose an embellishment. I like to stitch through the hole on the back of the barrette to make sure that it will stay inside of the jacket.
Note: if you are going to sew a ribbon on, it is best to attach it when you are sewing the 2 pieces together at the beginning.

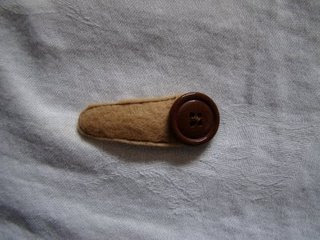

They are so fun to make and with just a little button, or felt flower or ribbon they turn out SO CUTE! I loved doing this because it seemed that with little effort I could get an adorable end product. I can't stop making them!
Now stop reading and go make some for yourself!!!
No comments:
Post a Comment